Step 1: Select a membership type (e.g., Abstractor, Agent, Agent Staff Addon, Associate, or Underwriter)
Here, you will select the membership type you would like to purchase by simply clicking on the image for the corresponding membership or hovering over the “cart” icon below the image and clicking “Select Options.”
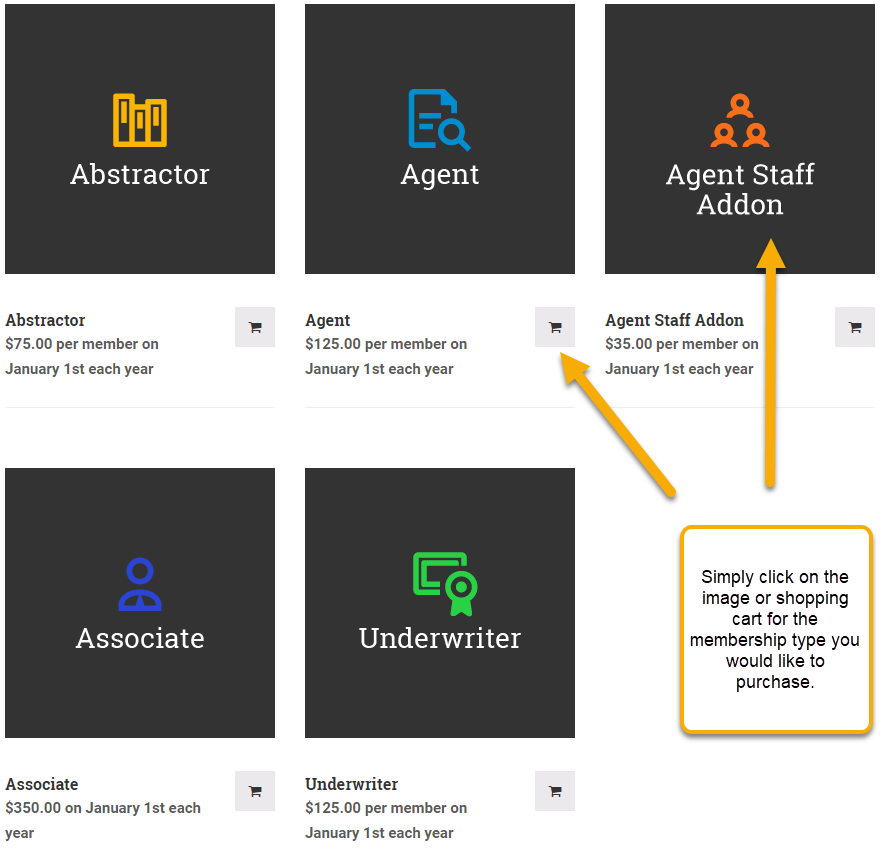
Note – you may have more than one membership type. For example, one person may subscribe to both Agent and Agent Staff Addon membership types. However, the team manager should only take a “seat” on team that corresponds with their membership type.
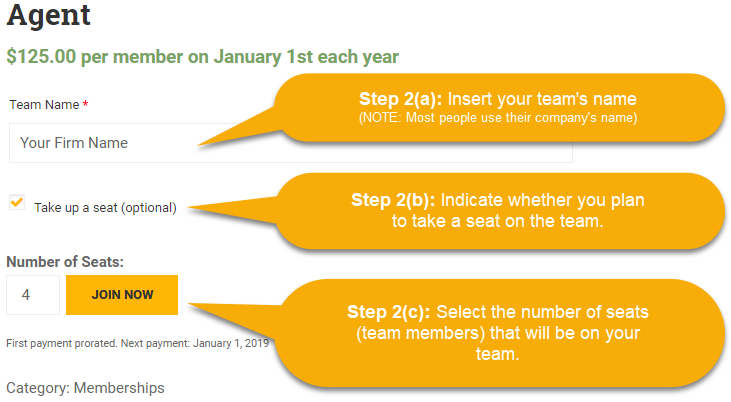
Step 2: Describe your team
Here, you will tell us three things: (1) your team name; (2) whether you plan to take a seat on the team; and (3) how many people will be on your team.
Your Team Name. The team name can be anything. The “team name” will be used to identify the team when you – the team manager (e.g., the person creating setting up the registration) – invites other individual users to join the team. If you will be the only person on your team, then the team name will have no significance (but is still required).
Take a Seat. If you plan to be an active member of the Association, then you will want to check the box to take up a seat. If you are a firm administrator, accountant, etc., and your role in creating the account is to simply enable other members of your organization to become active members of the Association and to pay their membership dues, then you should not check the box to take up a seat.
Number of Seats. For most membership types, membership dues are charged on a per individual basis. Therefore, if you plan to invite other members of your organization to participate as active members and will be paying all membership dues for your organization, then you must indicate how many individuals you plan to invite to your team. If you would prefer to manage only your membership, then simply leave this set to one (1) seat for yourself. Please note this option will not be available under the Associate membership since Associate membership is on a “per team” basis.
Step 3: Select join now
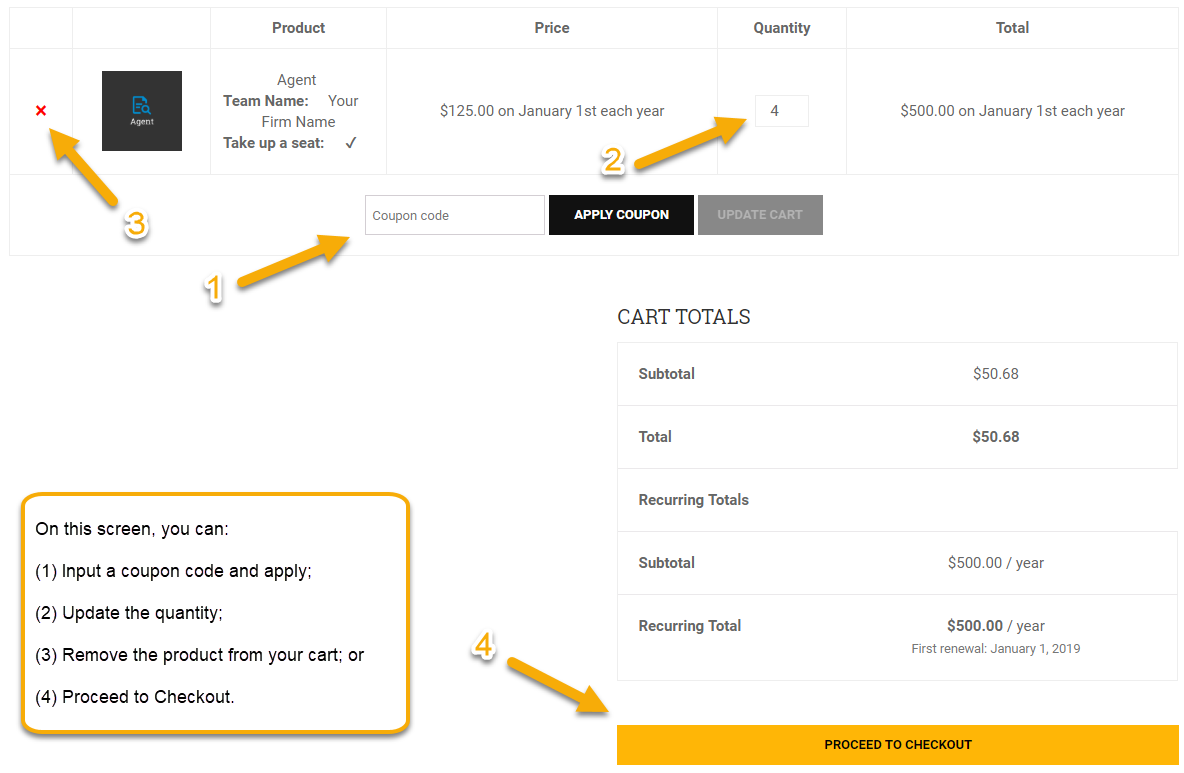
Once you’ve input the input a team name, checked (if applicable) that you will be a member of the team, and input the number of team members, then you simply select “Join Now”. Upon selecting Join Now, you will be taken to your shopping cart and given the opportunity to enter a coupon or proceed to checkout.
Step 4: Proceed to checkout
Once you proceed to checkout, you will have the opportunity to input your billing information. Please note that if you pay by credit card, then the billing details entered must match those associated with the card. The only two payment options available are paying by credit card and payment by check.
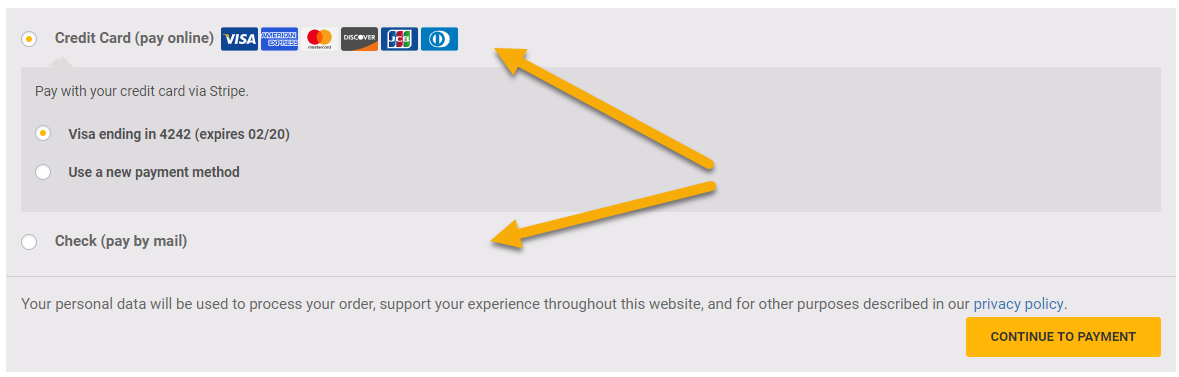
Please note that if you select payment by check, your membership will be placed on hold until your check is received and payment processed. No credit card information is stored on our website. To ensure PCI compliance, no credit card information is stored on our servers. All payments by credit card are processed using Stripe.
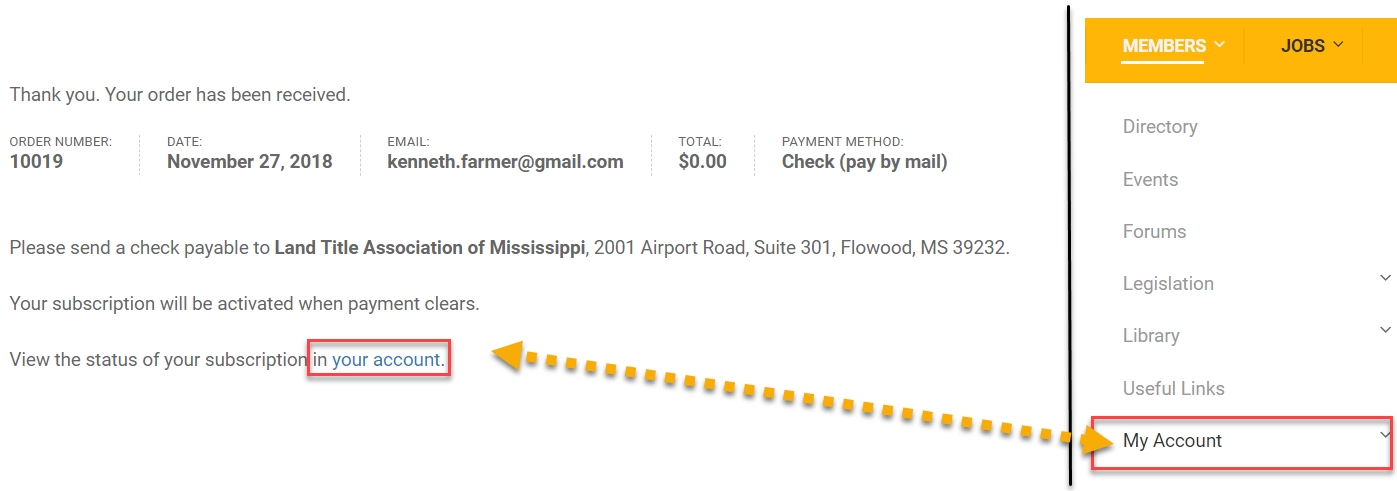
Step 5: Go to your account page (My Account)
Once you complete checkout, you will be directed to a page showing the details of your transaction. If you are the only person on your team and you marked the box to “take a seat” on the team, then you have completed the registration process. If you should have taken a seat on the team or you need to invite other people to your team, then you’ll need to invite them from your account page.
To get to your account, you can either (1) click the “your account” link on the checkout page, or (2) select the “My Account” menu item under the Members tab on the main menu:
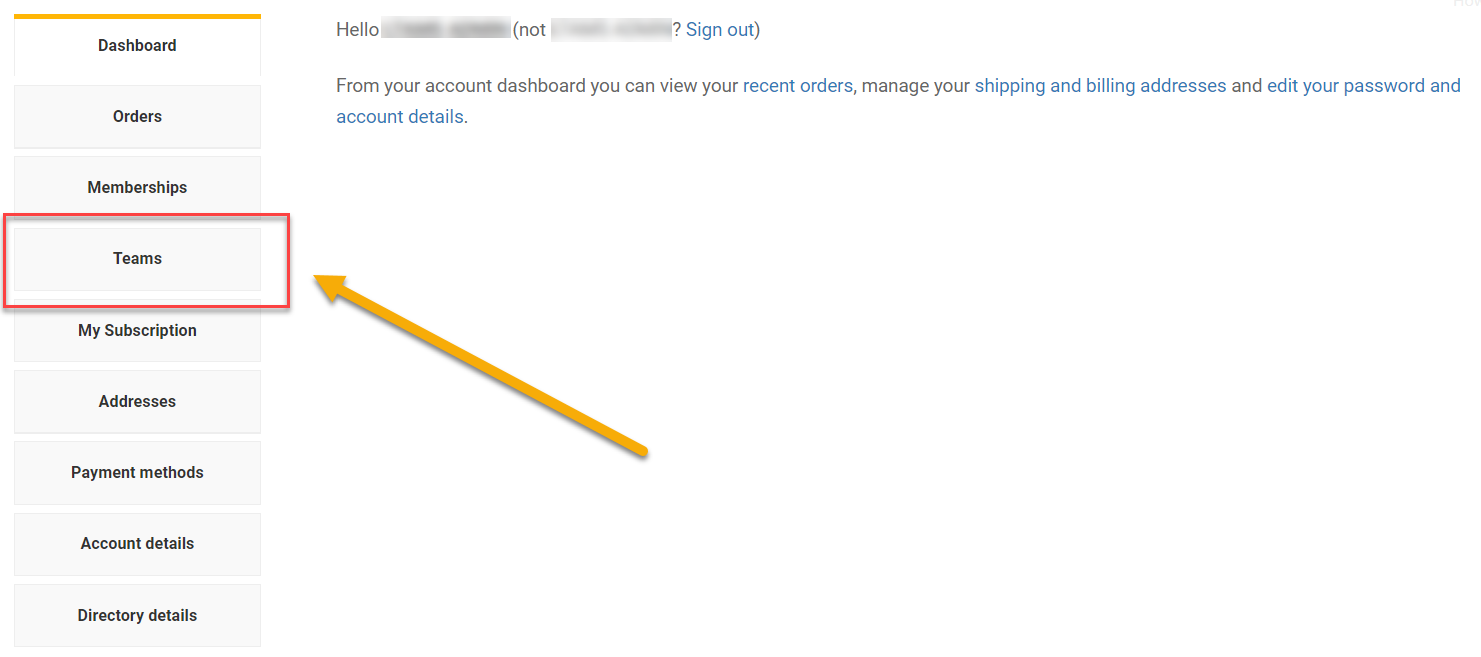
Step 6: Navigate to the “Teams” sub-menu
On your “My Account” page you should see a side-bar menu with a number of options. Select the menu item that says “Teams.”
Step 7: Navigate to the “Add Member” tab within Teams
While under the Teams tab of your “My Account” page you should see a side-bar menu, together with details on the current team makeup:
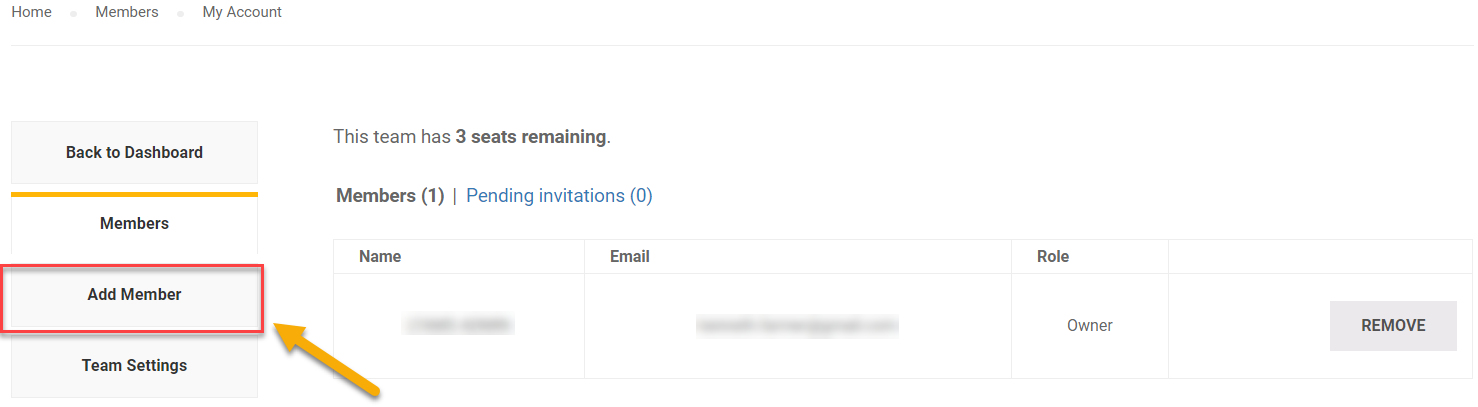
Select the side-bar menu items “Add Member” to add a new team member.
Step 8: Input new member e-mail address
While on the “Add Member” page, you can input the email address manually and set their role as “member” or “manager” of the team. This option generates an email that is sent to the user with a link for them to click. Alternatively, you can copy the registration link and email it via your own email account.
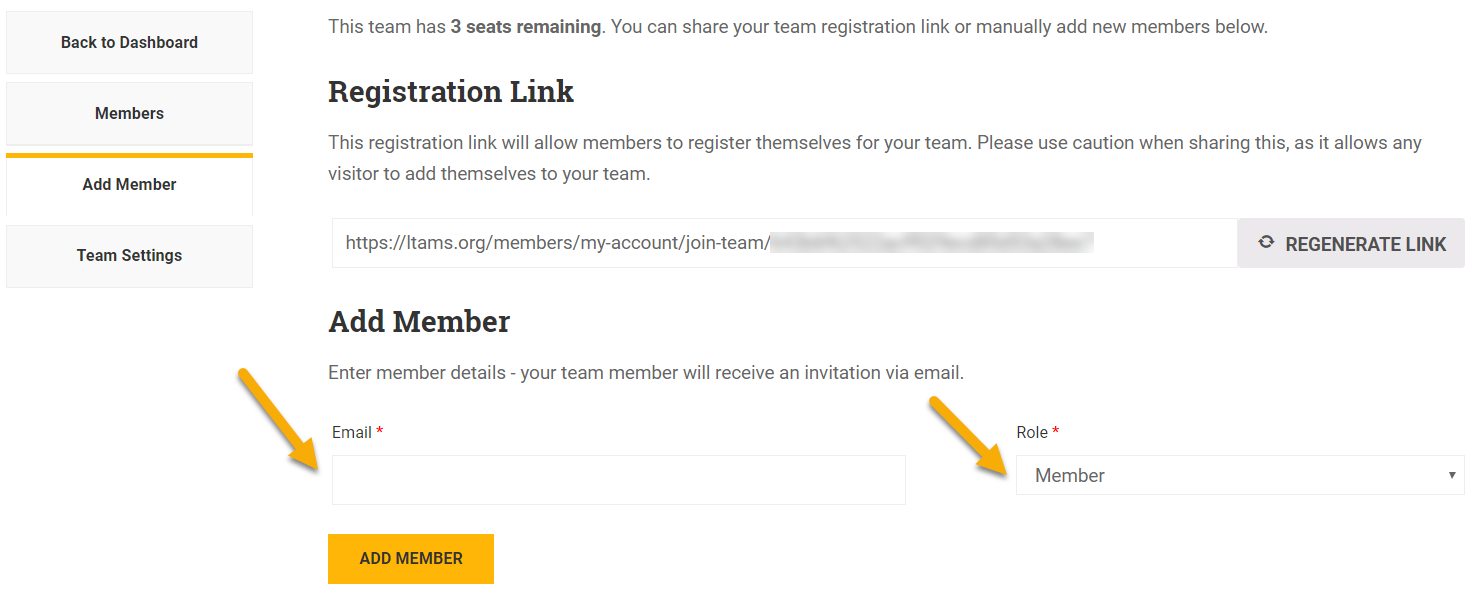
Important: If you email the registration link manually, anyone that clicks the link will be able to join the team.
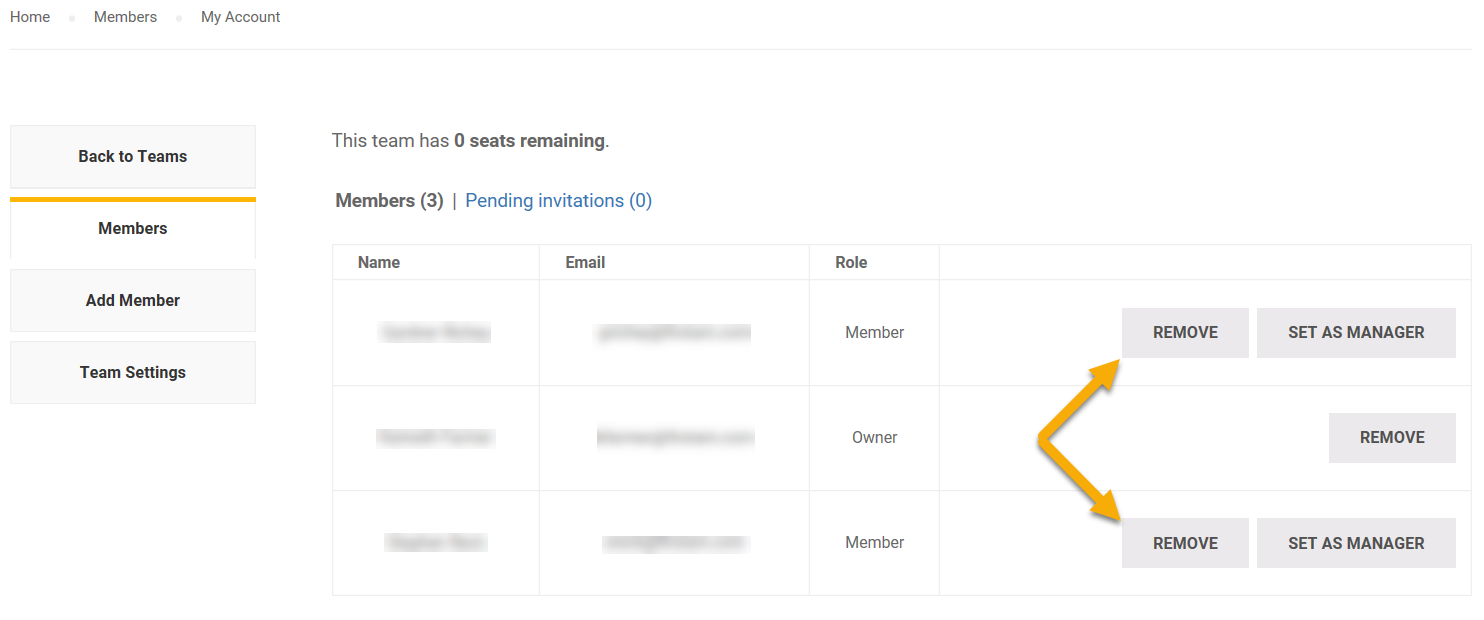
Step 9: Remove members from a team
If you need to remove a member from your team, simply return to the My Account > Team > Members tab and select “remove”.